Showing posts with label balloon. Show all posts

Thursday, September 1, 2016

September Etsy Update

It's been a super busy month or so behind the scenes at Riches and Roses. First up, I've been preparing for Etsy Australia's #makeforgood campaign. I've got two products listed in the campaign this year and will be donating 20% of sales of these to Plan Australia's "Because I Am a Girl" program. You can find out more about this in another post here on my blog.

I have also been sorting through my products in preparation for the pre-Christmas rush and updating fabrics for some products.

I'm currently busy cutting out and putting together a new batch of these little beauties, which will come out with three new cover designs in the coming weeks, stay tuned!


I've just finished some new cases for the Hungry Caterpillar sets in a new design - see the photos in the listing for details. The new case pictures the food on this page of the book.


I've also been updating the fabrics for all of my doll accessories. There are some really sweet prints on offer at the moment.


My two new car mats have been added to the shop and they are really cute. My son especially loves his version of the racing car mat and filling up his racing cars with petrol as they do their rounds of the track. You can see more on the racing car play mat here.


Another product that I've updated is the baby doll carrier. This new one matches in with the other baby doll products in my etsy store.


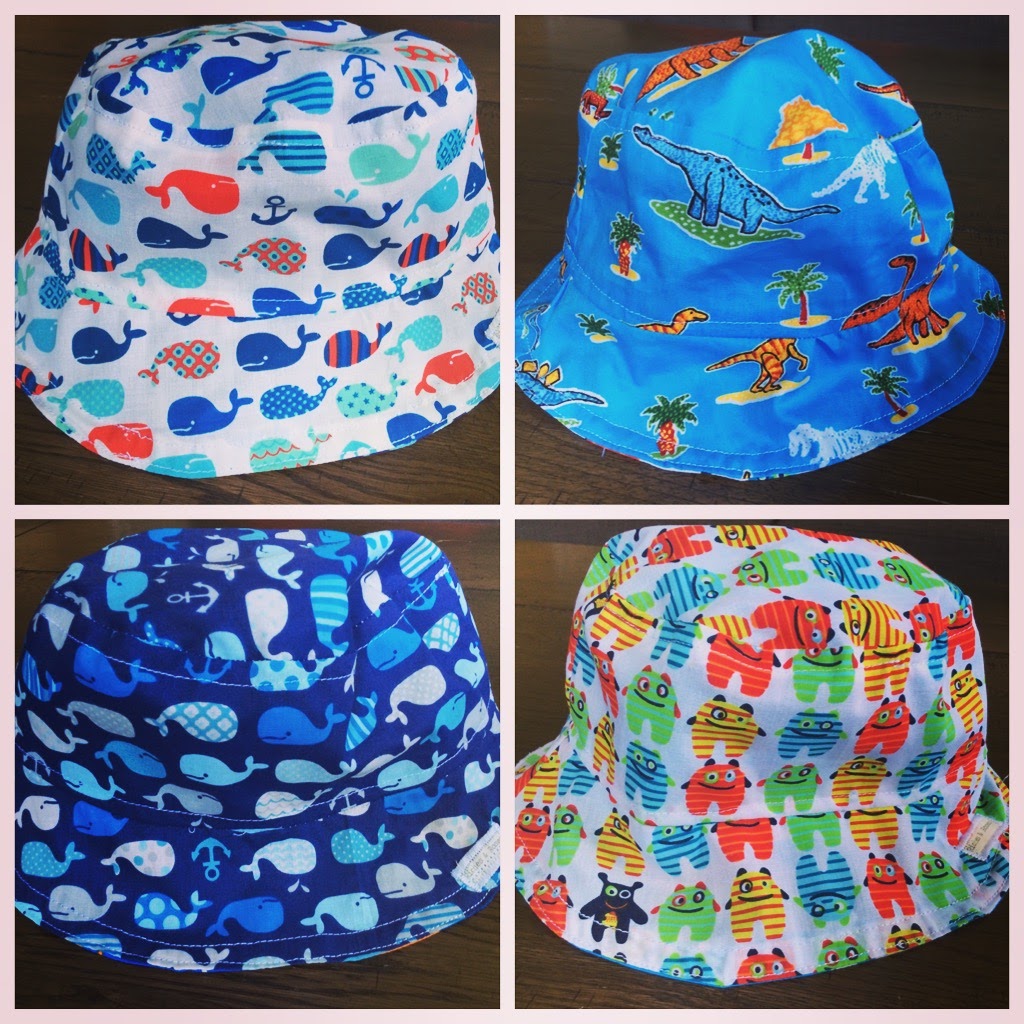
My newest product, just in time for warmer weather here in Australia is this cute little reversible kids sun hat available in four sizes to fit baby up to pre-school age.


Over the past few months, my best seller has been my cute little balloon covers which are available in two different designs. I've also updated these designs recently to include the bright owl prints and whale prints pictured below.


Busy busy busy, but never finished - stay tuned for a couple more new products that I'm working on!

Wednesday, June 22, 2016

Sewing Tutorial Quiet Book Pages - Rainbow, Butterfly, Hot Air Balloon

A few months ago a custom order came through my Etsy store. One of my most popular existing items is the Quiet Book that I sell through the store and one of the great things about it is that it is so easy to add extra pages to it as I join the pages together with ring binders.

The request was to add in one extra page (two-sided, so two extra designs) more suited to a smaller child. See the finished product below!


To make the rainbow, I cut the red (largest) semicircle first and then cut each next colour a little smaller. I then sewed the red semicircle onto the page and followed with each smaller one until I was done.

I overlapped two little light grey clouds over the bottom edge and cut out two identical pieces in a small butterfly shape. I sewed these together, inserting antennae and leaving a small opening on each side so that I could feed through the thin ribbon. When constructing the page and joining it to the previous one, I fastened in the ribbon between the pages. 

The cute little butterfly can be pulled along the ribbon to fly around in front of the clouds.


For the hot air balloon, I first sewed the blue felt rectangle onto the background page as the sky. Then I added two little white clouds and sewed on the main hot air balloon shape (here in the white with coloured spots). I attached four short lengths of ribbon to the base of the balloon cover (here in orange), and then sewed this felt piece at the top of the balloon. I attached the ends of each ribbon at the bottom and then hid the ends by sewing the balloon basket over them.


The doll is used in another page (the tent and sleeping bag page) in the book, so rather than add another, and in order to make it easier to handle for a small child, I attached a ribbon to the doll so that it could be used for both pages, and also couldn't be easily lost - double win!


Saturday, June 11, 2016

Riches and Roses Etsy Update


For a mother of two kids aged 3 and 5, who works three days a week and has volunteer commitments, my Etsy store has been keeping me busy since around last Christmas with an average of about 4 orders per month since December.

Since then, I've updated my packaging and labelling, to use this cute little label on all my items:


I've also added in some new items including these baby doll accessories:


And some of my long standing products have suddenly become very popular, especially this cute little hungry caterpillar set.


The 5 most active products in my Etsy store so far this year have been:


<3 <3 <3

Saturday, May 23, 2015

Sewing tutorial and pattern - Balloon cover

These covers were one of those things that I had seen around and thought was such a great idea. "One day I'll make some of those...". When I finally got around to experimenting and going through with it last week I couldn't believe I had put it off that long! So easy and fast. And they have been the number one toy here with both Mr 2.5 and Miss 4.5 since I finished them. We love balloon covers!

You will need two contrasting fabrics and the pattern (available here).

Cut six of the curved strips on the fold, and three of the hexagons on the fold.


And now start sewing. Choose one of each fabric and place them right sides together. Sew down one side only. Now take a new piece and place it right sides together with the contrast fabric. Sew down the next side. Take another new piece and place it right sides together with the contrast fabric. Sew down the next side. Repeat, repeat, repeat until there are no curved strips left. Place the two open sides right sides together and sew down to join.


Prepare the ends for sewing. Place two of the hexagons with right sides together. Pin a line through the centre across the hexagon. Sew from the outer edge inwards, leave a gap (approx 4cm) and then sew through to the other outer edge.

Fold down the pieces so that you now have wrong sides together and right sides showing.

Top stitch a few millimetres from the centre line on both sides to secure and to reinforce the slit that has now been formed in the middle of the piece.

Pin the hexagons into the ends of the ball, right sides together and sew along to enclose the ball.


Poke a deflated balloon through the opening at the end, keeping enough on the outside to blow the balloon up. Blow up the balloon, tie off the end and tuck it in.


Sunday, October 27, 2013

Part II - Alphabet Quiet Book

This is another of the Quiet Books that I finished at the weekend. I'm really happy with the variety of activities to do on the different pages.


A is for Apple...
The colours on this page came up really nicely. The apples are fastened on with velcro. Beneath each apple is the same shape to make it easy to match the sizes. 


B is for Balloon...
I've used velcro again here to fasten on the balloons in a colour matching activity. In the past I've also used coloured buttons and metal snap fasteners.

C is for Cat...
This is a simple page, but nice for practicing tying knots or bows.


D is for Dog...
My daughter has one of these pages in her quiet book and she loves opening and closing the buckle. Great for fine motor skills.

E is for Egg...
I love zipper pages. I think it's because my daughter has always enjoyed playing with the zipper page in her quiet book. Such a simple idea to us, but for little ones, they love opening the zipper and finding a little surprise inside to take out and put back in.


F is for Fish...
Magnetic fishing is always so much fun.


Stay tuned for some "How to" posts in the near future :)

See more at https://www.etsy.com/au/listing/167014595/toddler-quiet-book-alphabet-theme?