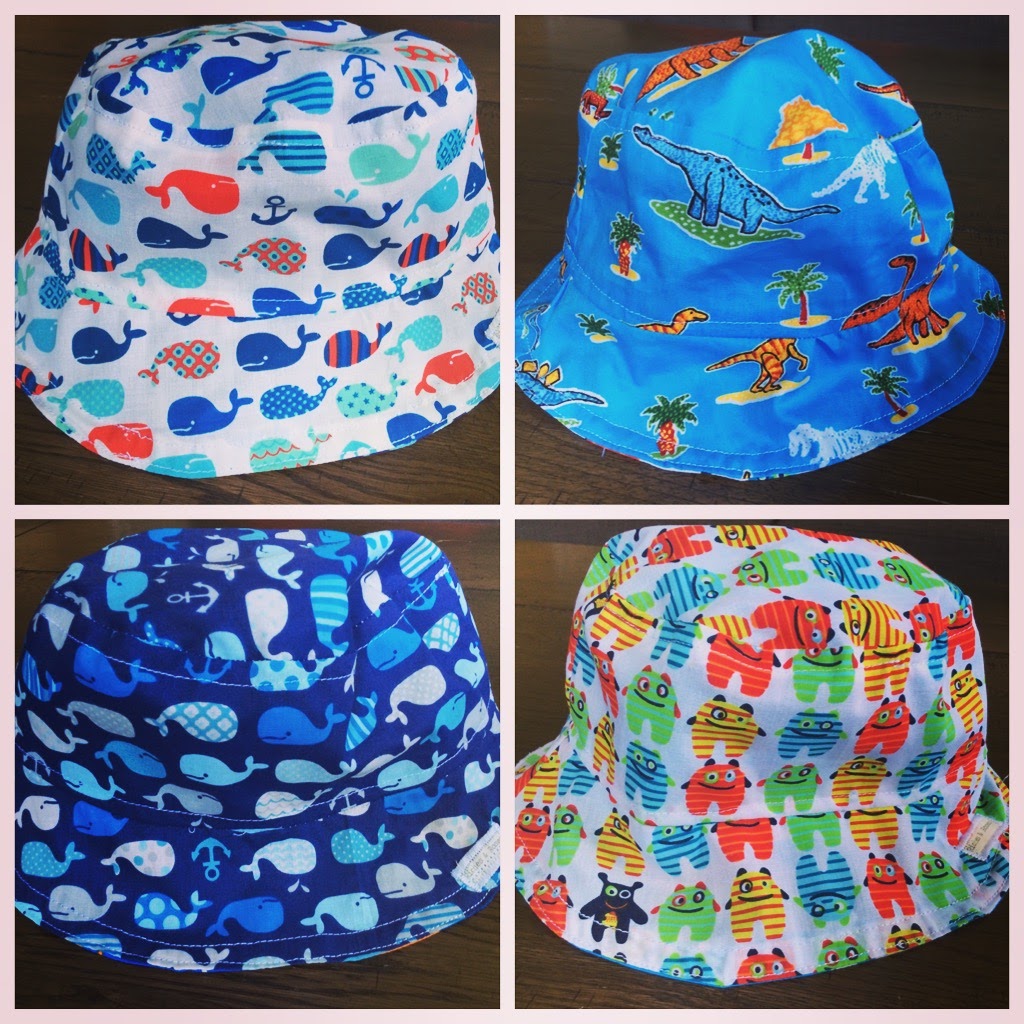
I love sewing clothes for my little boy. I love making toys and play accessories for him the most, but comfy shorts and pants for play and childcare days are my favourite clothes to make for him.
Here are five of my most recent pins to my Pinterest board "Sewing for Boys".
1. Jaden T-Shorts
This idea is great - turn a favourite adult T-shirt into a pair of shorts! I love ideas that encourage re-using and upcycling.
2. Baby Yoga Pants
Along the same lines as the T-Shorts. Recycle an old T-shirt to make some comfy pants. So simple!
3. Toddler Tour Pants
Cute pants with a patchwork insert down the sides of the legs and a really easy to follow tutorial.
4. Men's Shirt Baby Romper
Along the themes of upcycling - turn a cotton button-through shirt into a summery romper for a little boy.
5. Free Boy Patterns
A great collection of exactly what it claims to be - free patterns for boys. Heaps of easy to follow and easy to sew clothing for little ones.
Please share any great finds that you have below in the comments - I would love to find more!
Showing posts with label sewing. Show all posts
Friday, July 8, 2016
Tuesday, July 5, 2016
Riches and Roses July Etsy Update
It's been a BUSY past month in the Riches and Roses Etsy Store!
Top 3 Viewed Items
1. Toddler Quiet Book
2. Baby Doll Diaper Nappy Carry Bag
3. Balloon Cover


Top 3 listing favourites
1. Toddler Quiet Book
2. Kids' Tool Belt - orange
3. Kids' Tool Belt - pegs design
Biggest sales
1. Toddler Quiet book
2. Balloon Cover
3. Reversible Whales sun hat
Top 3 Viewed Items
1. Toddler Quiet Book
2. Baby Doll Diaper Nappy Carry Bag


Top 3 listing favourites
1. Toddler Quiet Book
2. Kids' Tool Belt - orange
3. Kids' Tool Belt - pegs design
Biggest sales
1. Toddler Quiet book
2. Balloon Cover
3. Reversible Whales sun hat
Monday, July 4, 2016
Monday Minute
It's an almost sewing-free Monday Minute this week. It's school holidays here in Queensland and so we left our kids with their grandparents for a few days and flew to Sydney for a grown up vacation.
I had an afternoon to myself at the Art Gallery of New South Wales to visit the Frida Kahlo & Diego Rivera exhibition, which was excellent!
And we were very lucky to get so much sunshine and blue sky, despite the cool weather - check out that view! Superb!

Not completely sewing free, as I arrived home to three little packages of fabric goodness - yay! How cute are those prints for kids?!!? I think my favourite is the yellow with bright dinosaurs :)
And a sweet little gift from a friend at work today - this little kit to make an Autumn Maiden doll. Bring on the weekend so I can get started on this little project.
Little miss 5 is also eager to help with this one! Hope to show you the finished product soon xx
Labels:
alphabet,
autumn,
bridge,
chevron,
coffee,
dinosaur,
doll,
dollmaking,
fabric,
fall,
felting,
harbor,
harbour,
holiday,
maiden,
opera house,
sewing,
sewing with kids,
sydney,
vacation
Monday, June 27, 2016
Monday Minute
It was a cutting out sort of weekend round here ~
I cut into my new Hungry Caterpillar fabric to make a new version of the case for the Hungry Caterpillar felt set in my etsy store.

I cut out some colourful page backgrounds and chalkboard vinyl numbers to put together a new counting quiet book.

Watching my three year old son's obsession with cars keep growing, I finally cut out some car play mats. First, this racing mat.

And then this little town mat. Stay tuned for some of the detail I plan to add to this one!

And finally.... a whole pile of fabric pages to start putting together a new batch of quiet books! Yay!
I cut into my new Hungry Caterpillar fabric to make a new version of the case for the Hungry Caterpillar felt set in my etsy store.

I cut out some colourful page backgrounds and chalkboard vinyl numbers to put together a new counting quiet book.

Watching my three year old son's obsession with cars keep growing, I finally cut out some car play mats. First, this racing mat.

And then this little town mat. Stay tuned for some of the detail I plan to add to this one!

And finally.... a whole pile of fabric pages to start putting together a new batch of quiet books! Yay!
Saturday, June 25, 2016
Fabric Favourites
Sometimes it seems kids get to have all the fun. My son has shorts covered in little monsters, and another pair in sharks. He has pants with dinosaurs on the trim and a reversible hat with bugs on one side and vehicles on the other.
My daughter has a skirt covered in rainbow spots and multiple items made out of different owl designs.
I shouldn't complain too much though as it can be a lot of fun shopping for kids fabric and as you can see, I'm building up quite the stash <3 <3 <3
Which one do you like the best?
Friday, June 24, 2016
Pyramid zipper coin purse
Earlier in the year, I went to a craft fair here in Brisbane, where I bought a little kit to make this tetrahedron zipper pouch. When I saw it, my geeky side (I used to be a high school maths teacher) loved the idea - only a long zipper and a strip of fabric to make a little purse. The fabric strip is sewn along the zipper and as you close the zipper, a purse is formed!
And then of course, my 3-year old and 5-year old spotted it, and being zipper-obsessed as most kids are, begged me to make them both one.
The fabric strip was great, but it was fiddly to deal with the lining, so I perused the internet and came up with the perfect solution for a kids version - ribbon! Follow the link to Craft Passion where you'll find some great pictures and very useful instructions.
So I bought some ribbons... how cute are they?!?!
And some very long zippers, and got to work with the colours chosen by my children.


My kids are not really into coins, but the purses are the perfect size for storing tiny little treasures, like that one favourite car, dinosaur, or hairclip, or for just zipping and unzipping for fun.
And then of course, my 3-year old and 5-year old spotted it, and being zipper-obsessed as most kids are, begged me to make them both one.
The fabric strip was great, but it was fiddly to deal with the lining, so I perused the internet and came up with the perfect solution for a kids version - ribbon! Follow the link to Craft Passion where you'll find some great pictures and very useful instructions.
So I bought some ribbons... how cute are they?!?!
And some very long zippers, and got to work with the colours chosen by my children.


My kids are not really into coins, but the purses are the perfect size for storing tiny little treasures, like that one favourite car, dinosaur, or hairclip, or for just zipping and unzipping for fun.
Wednesday, June 22, 2016
Sewing Tutorial Quiet Book Pages - Rainbow, Butterfly, Hot Air Balloon
A few months ago a custom order came through my Etsy store. One of my most popular existing items is the Quiet Book that I sell through the store and one of the great things about it is that it is so easy to add extra pages to it as I join the pages together with ring binders.
The request was to add in one extra page (two-sided, so two extra designs) more suited to a smaller child. See the finished product below!
The doll is used in another page (the tent and sleeping bag page) in the book, so rather than add another, and in order to make it easier to handle for a small child, I attached a ribbon to the doll so that it could be used for both pages, and also couldn't be easily lost - double win!
The request was to add in one extra page (two-sided, so two extra designs) more suited to a smaller child. See the finished product below!
To make the rainbow, I cut the red (largest) semicircle first and then cut each next colour a little smaller. I then sewed the red semicircle onto the page and followed with each smaller one until I was done.
I overlapped two little light grey clouds over the bottom edge and cut out two identical pieces in a small butterfly shape. I sewed these together, inserting antennae and leaving a small opening on each side so that I could feed through the thin ribbon. When constructing the page and joining it to the previous one, I fastened in the ribbon between the pages.
The cute little butterfly can be pulled along the ribbon to fly around in front of the clouds.
For the hot air balloon, I first sewed the blue felt rectangle onto the background page as the sky. Then I added two little white clouds and sewed on the main hot air balloon shape (here in the white with coloured spots). I attached four short lengths of ribbon to the base of the balloon cover (here in orange), and then sewed this felt piece at the top of the balloon. I attached the ends of each ribbon at the bottom and then hid the ends by sewing the balloon basket over them.
The doll is used in another page (the tent and sleeping bag page) in the book, so rather than add another, and in order to make it easier to handle for a small child, I attached a ribbon to the doll so that it could be used for both pages, and also couldn't be easily lost - double win!
Tuesday, June 21, 2016
Sashiko inspiration!
In March this year I went to the Stitches and Craft Show here in Brisbane . It was a rare treat of a day all to myself and I was prepared this time by booking into a few workshops in advance by email.
Having lived in Japan in my 20s for 3.5 years, I have a fascination for all Japanese styles of handicraft and tried a lot while living there and on later visits back. Sashiko is something I've wanted to get into for a long time and have done a few smaller pieces in the past to make into greeting cards or coasters.
At the show, I went to a demonstration of Hitomezashi by Jane from Be Be Bold, which is a 'one stitch' style of sashiko. It is based on geometric patterns which run horizontally, vertically, and diagonally and you concentrate on one direction at a time, sewing through from one end to the other. I bought these little coasters above as a kit and sewed them up at home later. I love the simplicity of this method and how effective it looks. When I get the time (ha!) I would love to sit down and design some of my own patterns and try a larger piece. I also really like the white background with brightly coloured thread - it makes such a fresh change from the traditional white and indigo.
I also tried my hand at Boro patchwork for the first time, at a workshop run by Sue from Indigo Niche and ended up with this great little pin cushion at the end of the hour. I love the imperfection of it and the idea of using the old to make the new with the recycling of old fabric offcuts. It now has a practical use and a position in my sewing room. It's lovely to see my own handmade pieces being put to use in there - you can see it below in my sewing room, along with some of the Japanese pottery pieces I made when living in Japan, that I now use for storage.
Saturday, June 11, 2016
Riches and Roses Etsy Update
For a mother of two kids aged 3 and 5, who works three days a week and has volunteer commitments, my Etsy store has been keeping me busy since around last Christmas with an average of about 4 orders per month since December.
Since then, I've updated my packaging and labelling, to use this cute little label on all my items:
I've also added in some new items including these baby doll accessories:
And some of my long standing products have suddenly become very popular, especially this cute little hungry caterpillar set.
The 5 most active products in my Etsy store so far this year have been:
<3 <3 <3
Friday, June 10, 2016
Pinterest - Most Recent Pins - Sewing for Girls
Pinterest is my all time favourite social media tool. It's perfect for sewing, and even more perfect for the procrastinating sewist like myself. During the busy times when I don't have the time to sew, I can usually at least put aside 5 or 10 minutes to add to my pin boards.
My most viewed pin board is Sewing for Girls, due to a little tutorial I pinned on there from this blog about three years ago for a Toddler Pinafore Dress. It now has almost 26000 repins and 2000 loves on Pinterest and brings a lot of traffic to this blog too.
Here are my most recent five pins on the Sewing for Girls board:
Summer Wallets with Lanyards (Noodlehead)
The Sally dress for Astrid (by Kollabora)
Geranium Dress (by Made By Rae)
Rainbow Dress Tutorial (by Made by Rae)
Easy DIY Swim Cover Up (by It's Always Autumn)
Happy Sewing!
Tuesday, September 15, 2015
Sewing tutorial: Kids dress up ideas - firefighter
This is all you will need to make your own firefighter dress up costume:
Pin the grey felt to the centre of the yellow felt and sew along both edges of grey felt, in a few millimetres.
Then pin your strips in place on the shirt - the top strips will be placed level with the arm pit of the shirt and then the next strips down about halfway. Sew along both edges a few millimetres into the yellow felt.
- a long sleeved red shirt (I bought mine from a thrift store)
- felt - bright yellow and grey/silver
- thread, pins etc.
The first step is to cut strips of felt. The strips of yellow felt should be approx 8cm/3in and the grey will need to be about 2.5cm/1in.
Pin the grey felt to the centre of the yellow felt and sew along both edges of grey felt, in a few millimetres.
Then pin your strips in place on the shirt - the top strips will be placed level with the arm pit of the shirt and then the next strips down about halfway. Sew along both edges a few millimetres into the yellow felt.
Simple, but very effective!
Monday, September 14, 2015
All about me!
In the Riches and Roses sewing room it is rarely about me. It is usually all about sewing for my children and making kids' items for my etsy store. But a month or so ago I went through my fabric stash and found some fabrics that I wanted to put to use for myself.
Peppermint is an excellent magazine that I love to read when I can find or make the time. Their website has some really great free sewing patterns available with comprehensive instructions. This top that I made is called the Harvest Top (http://peppermintmag.com/other/sewing-school/) and it was easy to make. Just be aware that the size estimate is quite generous and the shoulders can end up quite loose. Mine has needed some adjustment.
This little A-line skirt is still in need of a hook and eye at the waist, but it's as good as done. I based it on one of the many free tutorials that are available online. I love a pattern that is based on measurements and a formula, rather than cutting out a million paper pieces to stick together, so this was perfect. I chose to use bias binding for the waist, but you could use facing instead. I had a new little bias binding tool to try out :)
This little top was super simple and just based on a picture I saw on Pinterest. I'm still a bit nervous about cutting into stretch fabric without a pattern, so I used an old T-shirt as a model and cut a paper pattern off it. It turned out a great fit.
I made a great top (or 2) from a free pattern I found online ages ago at https://blog.colettehq.com/news/free-pattern-to-download-the-sorbetto-top. I decided to play around a bit with the pattern to make a dress out of some red linen fabric I had in my stash and trim it with a Japanese style cotton. I love the result. It was a bit lumpy in the front, so I also made a belt to go with it.
The picture doesn't look like much with the top laying flat, but this top is very sweet and so comfy. I followed the tutorial at http://morningbymorningproductions.blogspot.co.nz/2012/09/gathered-dolman-sleeve-top-tutorial.html and was really happy with the result. The drape is really flattering.
After all of that selfish sewing, it's time to get ready for the upcoming warm weather and make some shorts and skirts for my kids.
Peppermint is an excellent magazine that I love to read when I can find or make the time. Their website has some really great free sewing patterns available with comprehensive instructions. This top that I made is called the Harvest Top (http://peppermintmag.com/other/sewing-school/) and it was easy to make. Just be aware that the size estimate is quite generous and the shoulders can end up quite loose. Mine has needed some adjustment.
This little A-line skirt is still in need of a hook and eye at the waist, but it's as good as done. I based it on one of the many free tutorials that are available online. I love a pattern that is based on measurements and a formula, rather than cutting out a million paper pieces to stick together, so this was perfect. I chose to use bias binding for the waist, but you could use facing instead. I had a new little bias binding tool to try out :)
This little top was super simple and just based on a picture I saw on Pinterest. I'm still a bit nervous about cutting into stretch fabric without a pattern, so I used an old T-shirt as a model and cut a paper pattern off it. It turned out a great fit.
I made a great top (or 2) from a free pattern I found online ages ago at https://blog.colettehq.com/news/free-pattern-to-download-the-sorbetto-top. I decided to play around a bit with the pattern to make a dress out of some red linen fabric I had in my stash and trim it with a Japanese style cotton. I love the result. It was a bit lumpy in the front, so I also made a belt to go with it.
The picture doesn't look like much with the top laying flat, but this top is very sweet and so comfy. I followed the tutorial at http://morningbymorningproductions.blogspot.co.nz/2012/09/gathered-dolman-sleeve-top-tutorial.html and was really happy with the result. The drape is really flattering.
After all of that selfish sewing, it's time to get ready for the upcoming warm weather and make some shorts and skirts for my kids.
Subscribe to:
Posts (Atom)