Showing posts with label quiet book. Show all posts

Friday, September 2, 2016

Toddler Chalk Number Quiet Book

If you've been following my recent posts, you would know that my Etsy store has been undergoing a transformation. I'm selling out some products I've had for a while, added a few new ones and updated several others with new fabrics and some new features. I've also joined the Etsy Make For Good Campaign this year with two great creative products for kids. I am so happy with how the store is looking at the moment, and just in time for the pre-Christmas shoppers - bring it on!

This Quiet Book has been in the works for a while, but life has been busy these last few months with changing jobs and reassessing a few other projects I've been involved in, but here it is finally finished.


There are ten number pages with chalk vinyl numbers appliqued on that little ones can trace around with chalk. Each page also has a matching bead counter so that kids can practice counting to each number and associate each figure with its amount.


I've also added in four new cover designs - bright, colourful and very fun! 


Check out the books here: https://www.etsy.com/au/listing/476407589/toddler-chalk-number-quiet-book?ref=shop_home_active_1

Thursday, September 1, 2016

September Etsy Update

It's been a super busy month or so behind the scenes at Riches and Roses. First up, I've been preparing for Etsy Australia's #makeforgood campaign. I've got two products listed in the campaign this year and will be donating 20% of sales of these to Plan Australia's "Because I Am a Girl" program. You can find out more about this in another post here on my blog.

I have also been sorting through my products in preparation for the pre-Christmas rush and updating fabrics for some products.

I'm currently busy cutting out and putting together a new batch of these little beauties, which will come out with three new cover designs in the coming weeks, stay tuned!


I've just finished some new cases for the Hungry Caterpillar sets in a new design - see the photos in the listing for details. The new case pictures the food on this page of the book.


I've also been updating the fabrics for all of my doll accessories. There are some really sweet prints on offer at the moment.


My two new car mats have been added to the shop and they are really cute. My son especially loves his version of the racing car mat and filling up his racing cars with petrol as they do their rounds of the track. You can see more on the racing car play mat here.


Another product that I've updated is the baby doll carrier. This new one matches in with the other baby doll products in my etsy store.


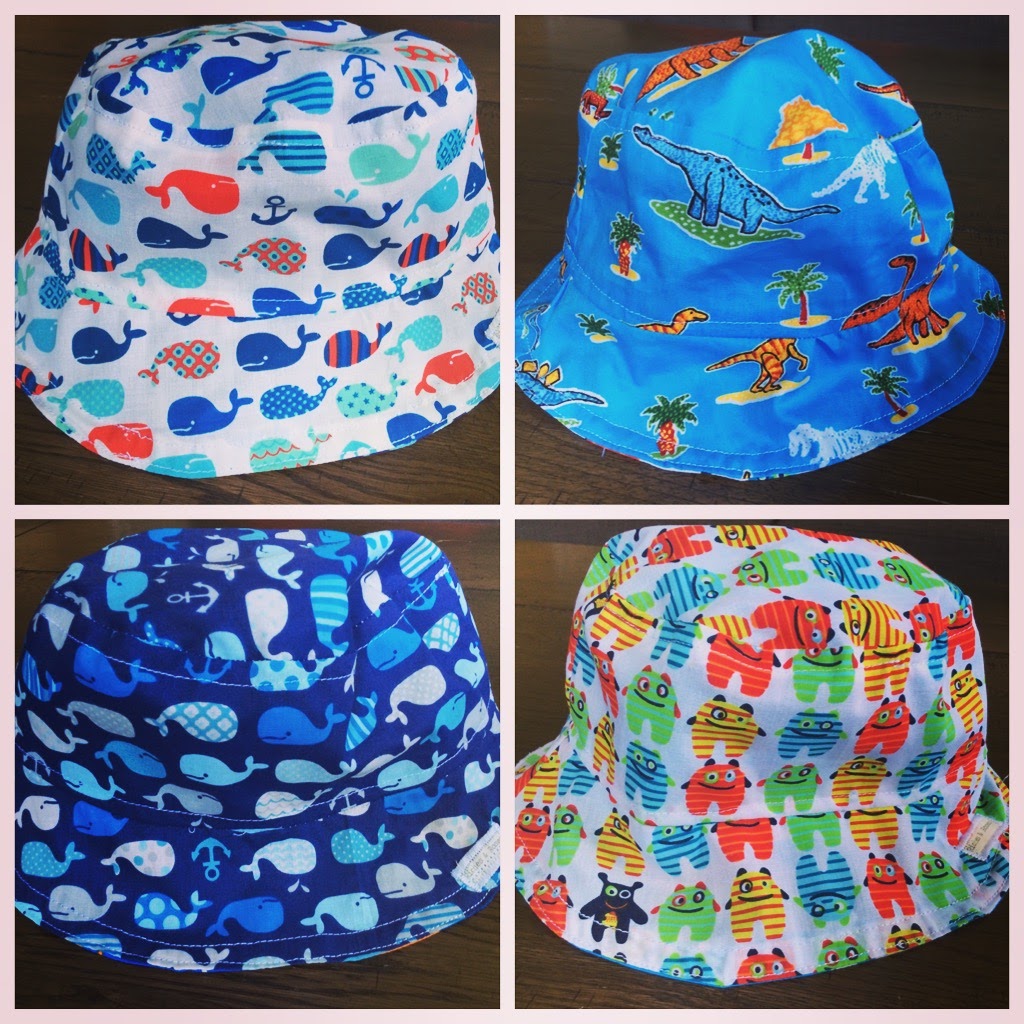
My newest product, just in time for warmer weather here in Australia is this cute little reversible kids sun hat available in four sizes to fit baby up to pre-school age.


Over the past few months, my best seller has been my cute little balloon covers which are available in two different designs. I've also updated these designs recently to include the bright owl prints and whale prints pictured below.


Busy busy busy, but never finished - stay tuned for a couple more new products that I'm working on!

Monday, June 27, 2016

Monday Minute

It was a cutting out sort of weekend round here ~

I cut into my new Hungry Caterpillar fabric to make a new version of the case for the Hungry Caterpillar felt set in my etsy store.


I cut out some colourful page backgrounds and chalkboard vinyl numbers to put together a new counting quiet book.


Watching my three year old son's obsession with cars keep growing, I finally cut out some car play mats. First, this racing mat.


And then this little town mat. Stay tuned for some of the detail I plan to add to this one!


And finally.... a whole pile of fabric pages to start putting together a new batch of quiet books! Yay!

Wednesday, June 22, 2016

Sewing Tutorial Quiet Book Pages - Rainbow, Butterfly, Hot Air Balloon

A few months ago a custom order came through my Etsy store. One of my most popular existing items is the Quiet Book that I sell through the store and one of the great things about it is that it is so easy to add extra pages to it as I join the pages together with ring binders.

The request was to add in one extra page (two-sided, so two extra designs) more suited to a smaller child. See the finished product below!


To make the rainbow, I cut the red (largest) semicircle first and then cut each next colour a little smaller. I then sewed the red semicircle onto the page and followed with each smaller one until I was done.

I overlapped two little light grey clouds over the bottom edge and cut out two identical pieces in a small butterfly shape. I sewed these together, inserting antennae and leaving a small opening on each side so that I could feed through the thin ribbon. When constructing the page and joining it to the previous one, I fastened in the ribbon between the pages. 

The cute little butterfly can be pulled along the ribbon to fly around in front of the clouds.


For the hot air balloon, I first sewed the blue felt rectangle onto the background page as the sky. Then I added two little white clouds and sewed on the main hot air balloon shape (here in the white with coloured spots). I attached four short lengths of ribbon to the base of the balloon cover (here in orange), and then sewed this felt piece at the top of the balloon. I attached the ends of each ribbon at the bottom and then hid the ends by sewing the balloon basket over them.


The doll is used in another page (the tent and sleeping bag page) in the book, so rather than add another, and in order to make it easier to handle for a small child, I attached a ribbon to the doll so that it could be used for both pages, and also couldn't be easily lost - double win!


Saturday, June 11, 2016

Riches and Roses Etsy Update


For a mother of two kids aged 3 and 5, who works three days a week and has volunteer commitments, my Etsy store has been keeping me busy since around last Christmas with an average of about 4 orders per month since December.

Since then, I've updated my packaging and labelling, to use this cute little label on all my items:


I've also added in some new items including these baby doll accessories:


And some of my long standing products have suddenly become very popular, especially this cute little hungry caterpillar set.


The 5 most active products in my Etsy store so far this year have been:


<3 <3 <3

Saturday, May 23, 2015

Sewing Tutorial: Putting together your Quiet Book pages to make a book

You've spent hours cutting out little felt shapes, positioning them on pages, sewing, stitching on faces and finishing touches and now you have the pages all made for your Quiet Book. Well done! It's no easy task. No doubt plenty of patience, glasses of wine and cups of tea have passed between you and your Quiet Book pages. So let's take a look at one way to put it all together and make a book out of what you've got in front of you.


Work out the order of your pages and then pair them up in front to back pairs. Put them right sides together. Sew around with approximately 1cm/0.5 inch seam, leaving a gap wide enough for turning out the right way. Trim the corners as in the picture below.


Turn out the right way and push the corners out to neaten. It should look something like this:


Then sew a top-stitch a few millimetres from the edge to neaten it off and close off the opening.

Covers can be made in the same way (you'll need front and back covers):

  • right sides together
  • sew around, leaving an opening
  • trim corners
  • turn out the right way
  • topstitch edges
I like to add a button tab to my cover. The length and width depend on the thickness and size of your book. Cut two rectangles, allowing a 0.5cm/0.25 inch seam and follow the same steps as above.


Of course there are loads of options for putting your pages together, but my favourite way is to use binder rings. I then sew two buttonholes on each page where I want to place them. Easy! Especially if your sewing machine does automatic buttonholes as mine does :-)


Thursday, May 21, 2015

Sewing tutorial: Quiet book pages - Bead counter

This is one page I really like to include in my books. Both of my kids love counting and one of their favourite pages in their quiet book is the bead counter. They enjoy moving the beads across, and they also learn their colours by practicing with the beads. It is an easy and effective page.


The starting point for making the page is deciding how wide to make the counter (then cut your thin ribbon in appropriate lengths), to what number to count to (in my larger books, I have include counters that go up to ten), and finally what colours to choose. 

The ribbon I use is very narrow and I do not like to take any chances with safety with beads coming loose, so my first step is to space the ribbons on the page and sew them to the page background. My green felt is about 1.5cm wide, so I sew along the ribbons for about a length of 1cm on one side first. Then I thread my beads on and sew down on the other side to secure the ribbons down and lock the beads in. 

Place the felt lengths over the ribbon ends where you have sewn and pin down. Sew a stitch around the edges. Finally trim off the threads and ribbon ends and your bead counter is done!


Saturday, March 7, 2015

Sewing Tutorial: Quiet Book Page - Tent and Sleeping Bag (zippers)


The idea for this page came from Still:Living, but has been modified over time by me.

I usually use a cotton drill or poly cotton for the blue sky backing and felt for the remainder of the page.

STEP ONE

You will need to draw on your transfer paper:
  • a rectangle for the background (leaving about three cm around all sides for stitching and borders), to be ironed onto blue cotton fabric. 
  • a crescent moon to be ironed onto white felt. 
  • outline for the doll, to be ironed onto a skin coloured felt. 
  • outline for dolls clothing - shorts, shirt to be ironed onto chosen felt colours. 
  • outline for dolls hair to be ironed onto chosen felt colour. 
Iron these pieces onto the corresponding fabrics and and cut out.


STEP TWO

Peel off the paper layers. Iron on the background piece to the page fabric. Then iron on the moon shape in the top left corner. 

Iron the body felt piece onto a neutral background piece of felt and then iron on the shirt, shorts and hair.

  
STEP THREE

As you will not be ironing them on, but only sewing, you will also need a triangle for the tent, cut through the centre and a rectangle for the sleeping bag, also cut through the centre.

Sew these either side of a zipper, making sure that the bottom edge is against the bottom edge (where the zipper closes) of the zipper.

Trim the zipper along the edge of the felt and sew several times over near the top, cut off end of the zipper. 


STEP FOUR

Check that the sleeping bag fits under the tent and if not, trim sleeping bag down.

Sew the sleeping bag onto the background. Then sew the tent over the top. Sew a zigzag stitch around the edges of the background.

STEP FIVE

Cut out the doll and sew around the edges to fasten the felt layers together. Sew on eyes and a mouth.


FINISHED! Put your doll to bed in her/ his tent :-)